MyFaireLady.com


Inventive.             Lively.             Multi-faceted.           Appealing.

(The Sleeve Farthingale Diary is being worked on, but read below what I've updated so far.  Many pictures are still missing, but the text is there.)


         V1.0 Introduction & Background musings

         V1.0 Construction Notes, Pictures & Commentary

         V1.0 Wordless Pictures

         V2.0: New Thoughts on an Old Project

         Update 12-16-12!  They're big enough, already!!!


Image description

V1.0   FARTHINGALE SLEEVES INTRODUCTION & BACKGROUND MUSINGS


9-13-07: I feel like I should be on Dr. Who…


As some of you may already have read, I’m in the process of making my own reproduction of the gown QEI wears in her Ditchley Portrait. I’ve already made a satisfactory French Farthingale, so the next task was to come up with some nice “Farthingale Sleeves” to go with the outfit, but how to make them…I’m not SCA, don’t have access to libraries with great resources…all I’ve got is what I can research online…and create in my mind.


So, I put on my thinking cap, sharpened my pencil, and set to work. I had already despaired of finding anything online that was remotely useful for my needs. Most of the sleeves I came up with were bombasted to pouf them out. I didn’t want to be dealing with all that stuffing (read: heat) next to my skin. I needed to come up with something that was going to be light and as cool as possible to wear. Strict authenticity was not crucial, though I wanted the final product to support a look as much like the one in the portrait as possible.


These basic details having been decided on, I put my drafting skills to work and set about to create a two-part sleeve that would be held in shape by modern-day reeds (read: plastic trimmer wire). I ultimately wound up adding some cable ties in the topmost tiers for extra strength there, since that part of the sleeves would have a significant amount of weight on their shoulders (pun intended). I decided to make them attached to a body of linen so that I can wear them with more than one outfit, though I might wind up detaching them and making them up separately so that they tie onto the inside of the gown’s sleeves. I’m still working that part out.


Anyway, here's a close-up of the torso:

Image description

And here is a close-up of one sleeve:.

Image description


           Hmmm...

What do you think?  I'm not so sure about it...


       Let me put the two silhouettes side-by-side...


Image description


Well…it might be ok, though the sleeves look a bit wide around the elbow--like they should taper down more severely--it could also be an illusion due to the netting material allowing us to see through them.


Image description
I think the solution is to make a mock-up pair of sleeves out of cheap muslin before I start tinkering with the actual sleeve farthingales.  They just took too long to make to mess them up now!

NEXT CHAPTER: Supersize It?

2 Responses to “Farthingale Sleeves Introduction and Background Musings”

  1. Diana Hill, on September 14th, 2007 at 3:25 pm Said:

    Awesome! Hi, I have had the pleasure of seeing you as QE1 in Danville, IL now two times. This time I didn’t lose your website and e-mail. You are unbelievable. The time and effort that go into these gowns. I don’t even know what some of the sewing terms mean: “Farthingales, bombasted, etc.” This will be interesting to study. Thank you for sharing your experiences.

  2. MyFaireLady, on September 14th, 2007 at 11:15 pm Said:

    Thanks, Diana! I’m glad you stopped by. Hopefully, I’ll wear this gown next year at the faire…if I ever get all those flower poufs finished...


V1.0  FARTHINGALE SLEEVES CONSTRUCTION NOTES:


Eventually, I will have something here, but in the meantime, enjoy the rest of the article.


NEXT CHAPTER: Pictures & Commentary


V1.0  FARTHINGALE SLEEVE PICTURES & COMMENTARY:


Eventually I will have pictures here, but in the meantime, enjoy the rest of the article.


Image description
Image description
Image description
Image description


And there will be other comments here...


and probably here, too...

Image description
Image description


And here will be those "wordless pictures" we all love...once I get them uploaded...Feel free to post a comment if anything doesn’t make sense, but in the meantime, the article continues below the spaces where the pictures will be.


Image description
Image description
Image description
Image description
Image description
Image description
Image description
Image description
Image description
Image description
Image description
Image description
Image description
Image description
Image description


9-15-07: Supersize it?


After looking at the sleeve farthingales on my mannequin for like the hundredth time and posting a question on an online forum I frequent, I came up with the idea of trying to draw where Lizzie’s body actualy is underneath all the layers and bling so that I could compare that to what I have. Here are the results:


Image description
Image description

Which do you think produces the more accurate silhouette? The top line or the bottom one? I keep changing my mind…

...one thing is for certain though: my sleeve farthingales are too small...Snif...

2 Responses to “9-15-07: Supersize it?”

  1. dayna thomas, on September 20th, 2007 at 11:32 am Said:

    Top lines, definitely, and that takes care of a lot of the “not tapered enough” look too, at least to my eye.    BTW, you’re Crazy!!!    I Love It!!!!

    It’s people like you that make the rest of us shut up and keep beading, I’m up to 50,000 seed beads on my forepanel, but I’m not sure it’s enough.

    BTW, I’m not kidding, I’m just as crazy :-)

  2. admin, on September 21st, 2007 at 7:30 am Said:                                                                                                                   Thanks for the comment, Dayna. I think bigger is better, too. I posted the new pattern I’ll be working from, so we’ll see what it looks like when I make the mock-up. Thanks again for your input!…OH, and I think you might just be crazier than me…50,000 SEED beads?!!   I would never have the patience.

9-20-07: The New Pattern


I’ve been mulling over how to fix the sleeve, and this is what I have planned so far: I’m going to leave the one I have how it is and just make a “cap” that will create the right silhouette by fitting over the top of the original sleeve farthingale. That way, I can still use what I have, it’ll just be for a gown with smaller sleeves.


I think this new pattern will do it, but I’m only on the paper/drafting stage at this point. I’m going to make a muslin mock-up to check it next, but in the meantime, here’s a picture of the new top pattern piece:


Image description

ADDENDUM:  I've also (I think) decided to make a brand spankin’ new set of sleeve farthingales with this bigger, better silhouette rather than fuss with making a sleeve cap and then have two pieces of sleeve to contend with. AND since I’ve also found some fishnet material in cotton at a local fabric store, I’m good to go! What I need now is some more bias tape…lots and lots of bias tape for all those casings…le sigh…stay tuned for more soon!

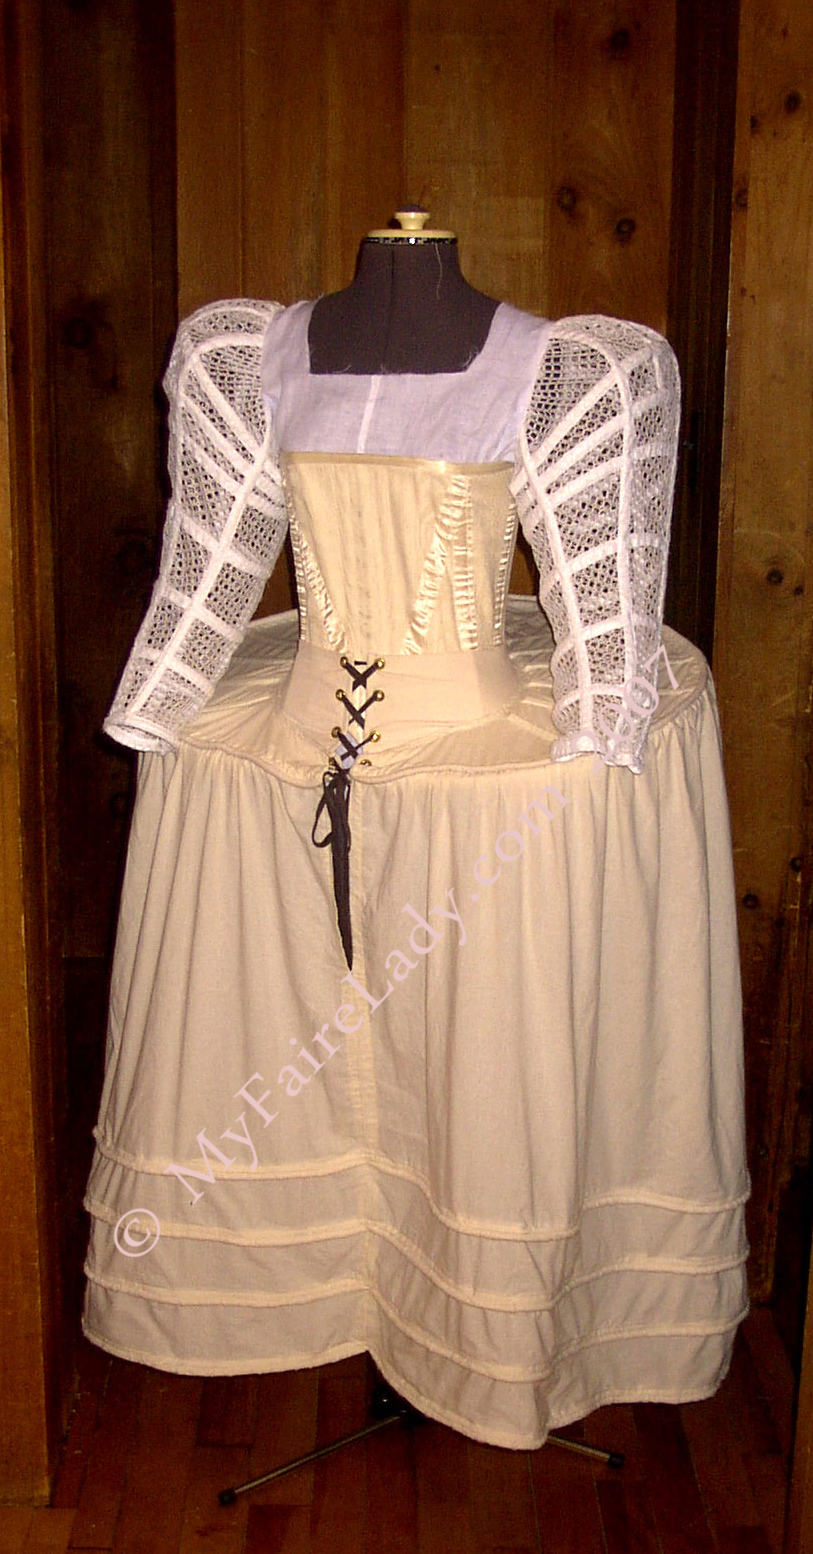
3-9-08: The Muslin Mock-Up


YAY, HOORAY, HUZZAH or (insert your own favorite exclamation of joy here)!!!

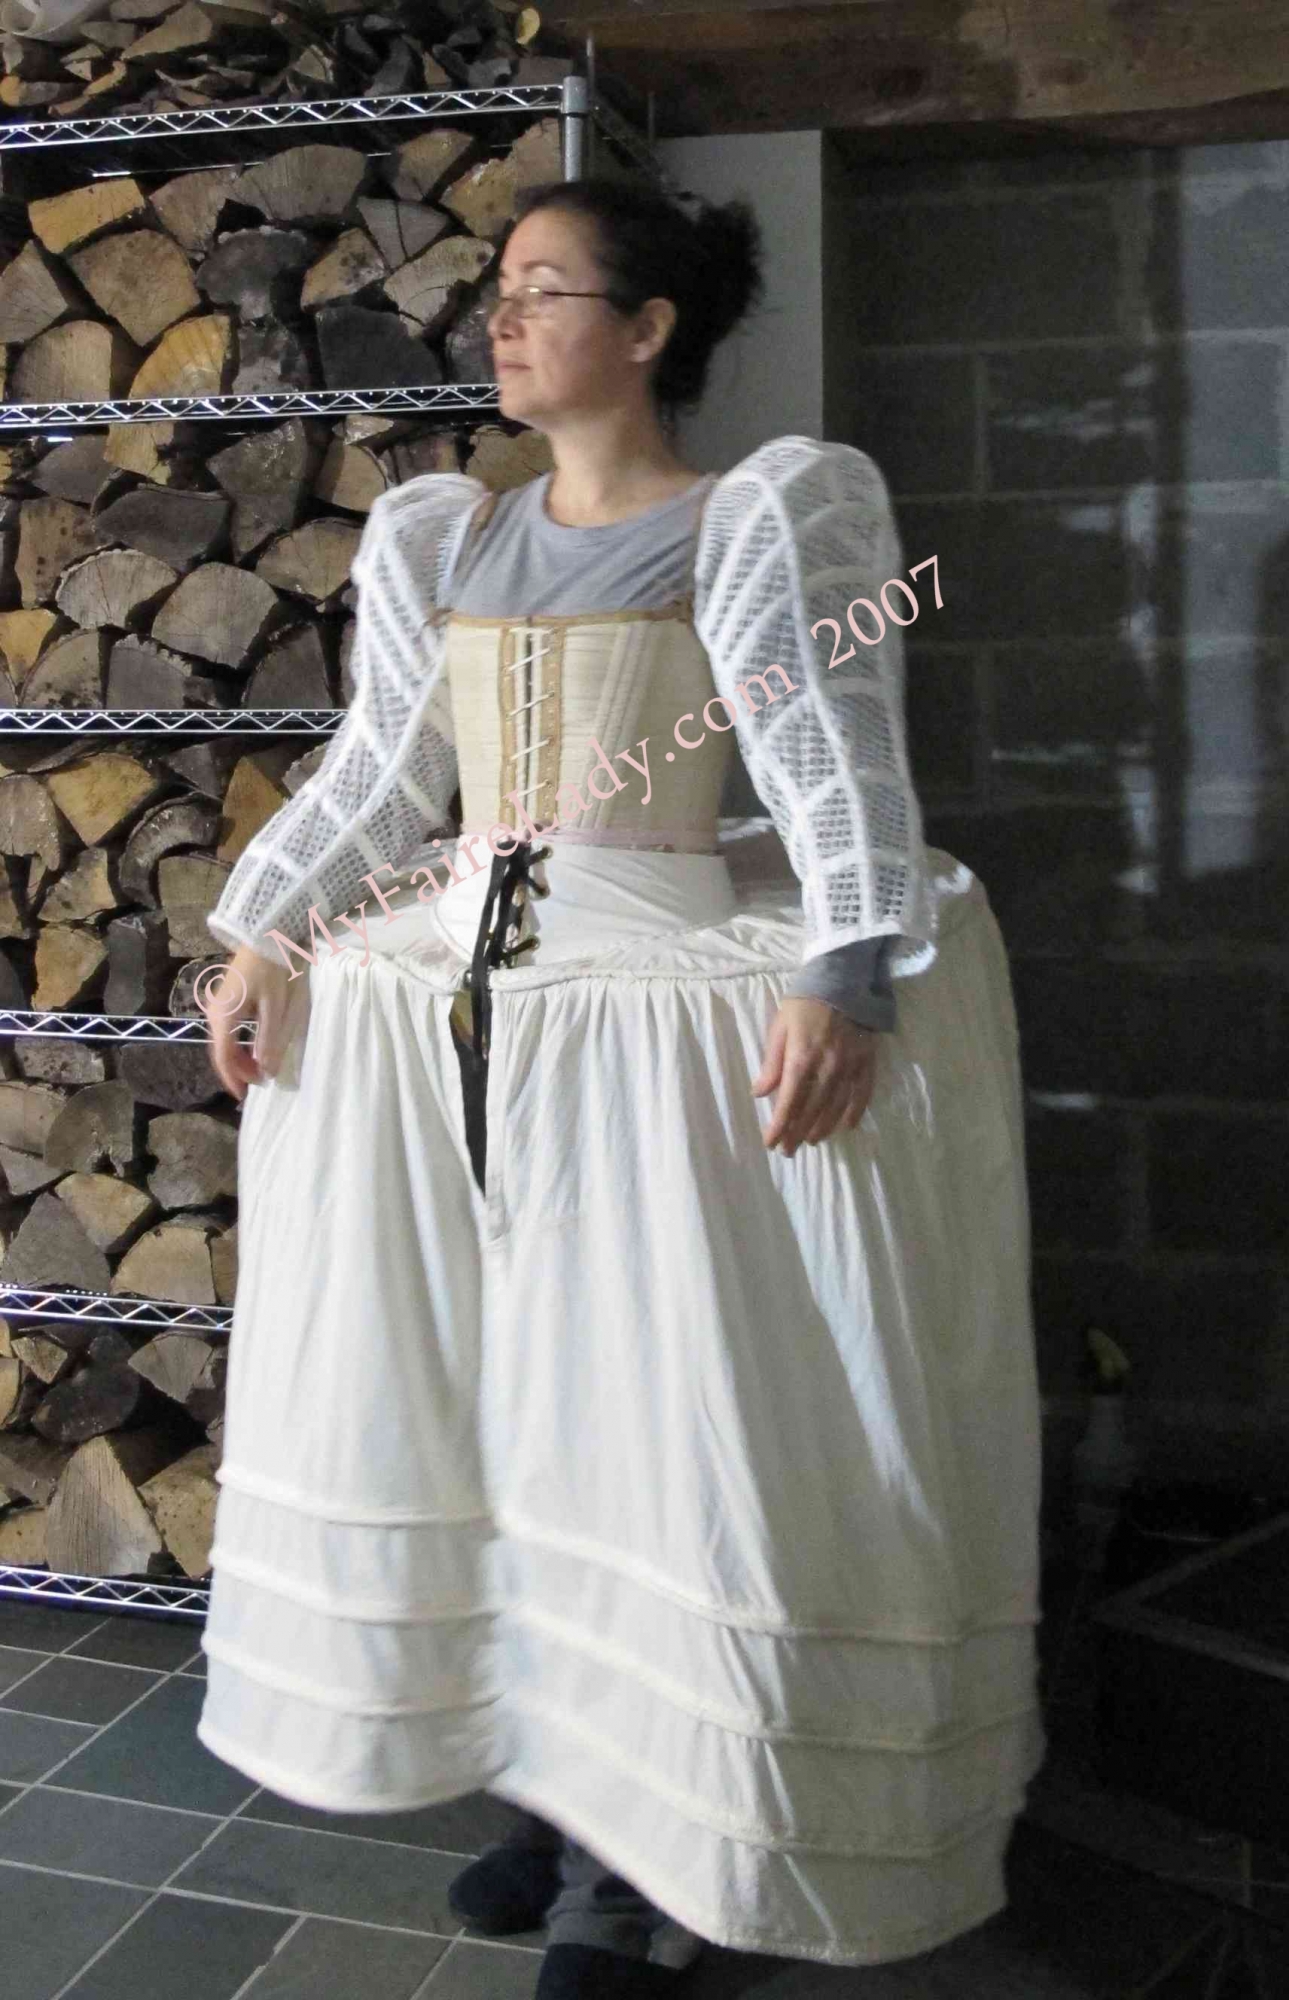
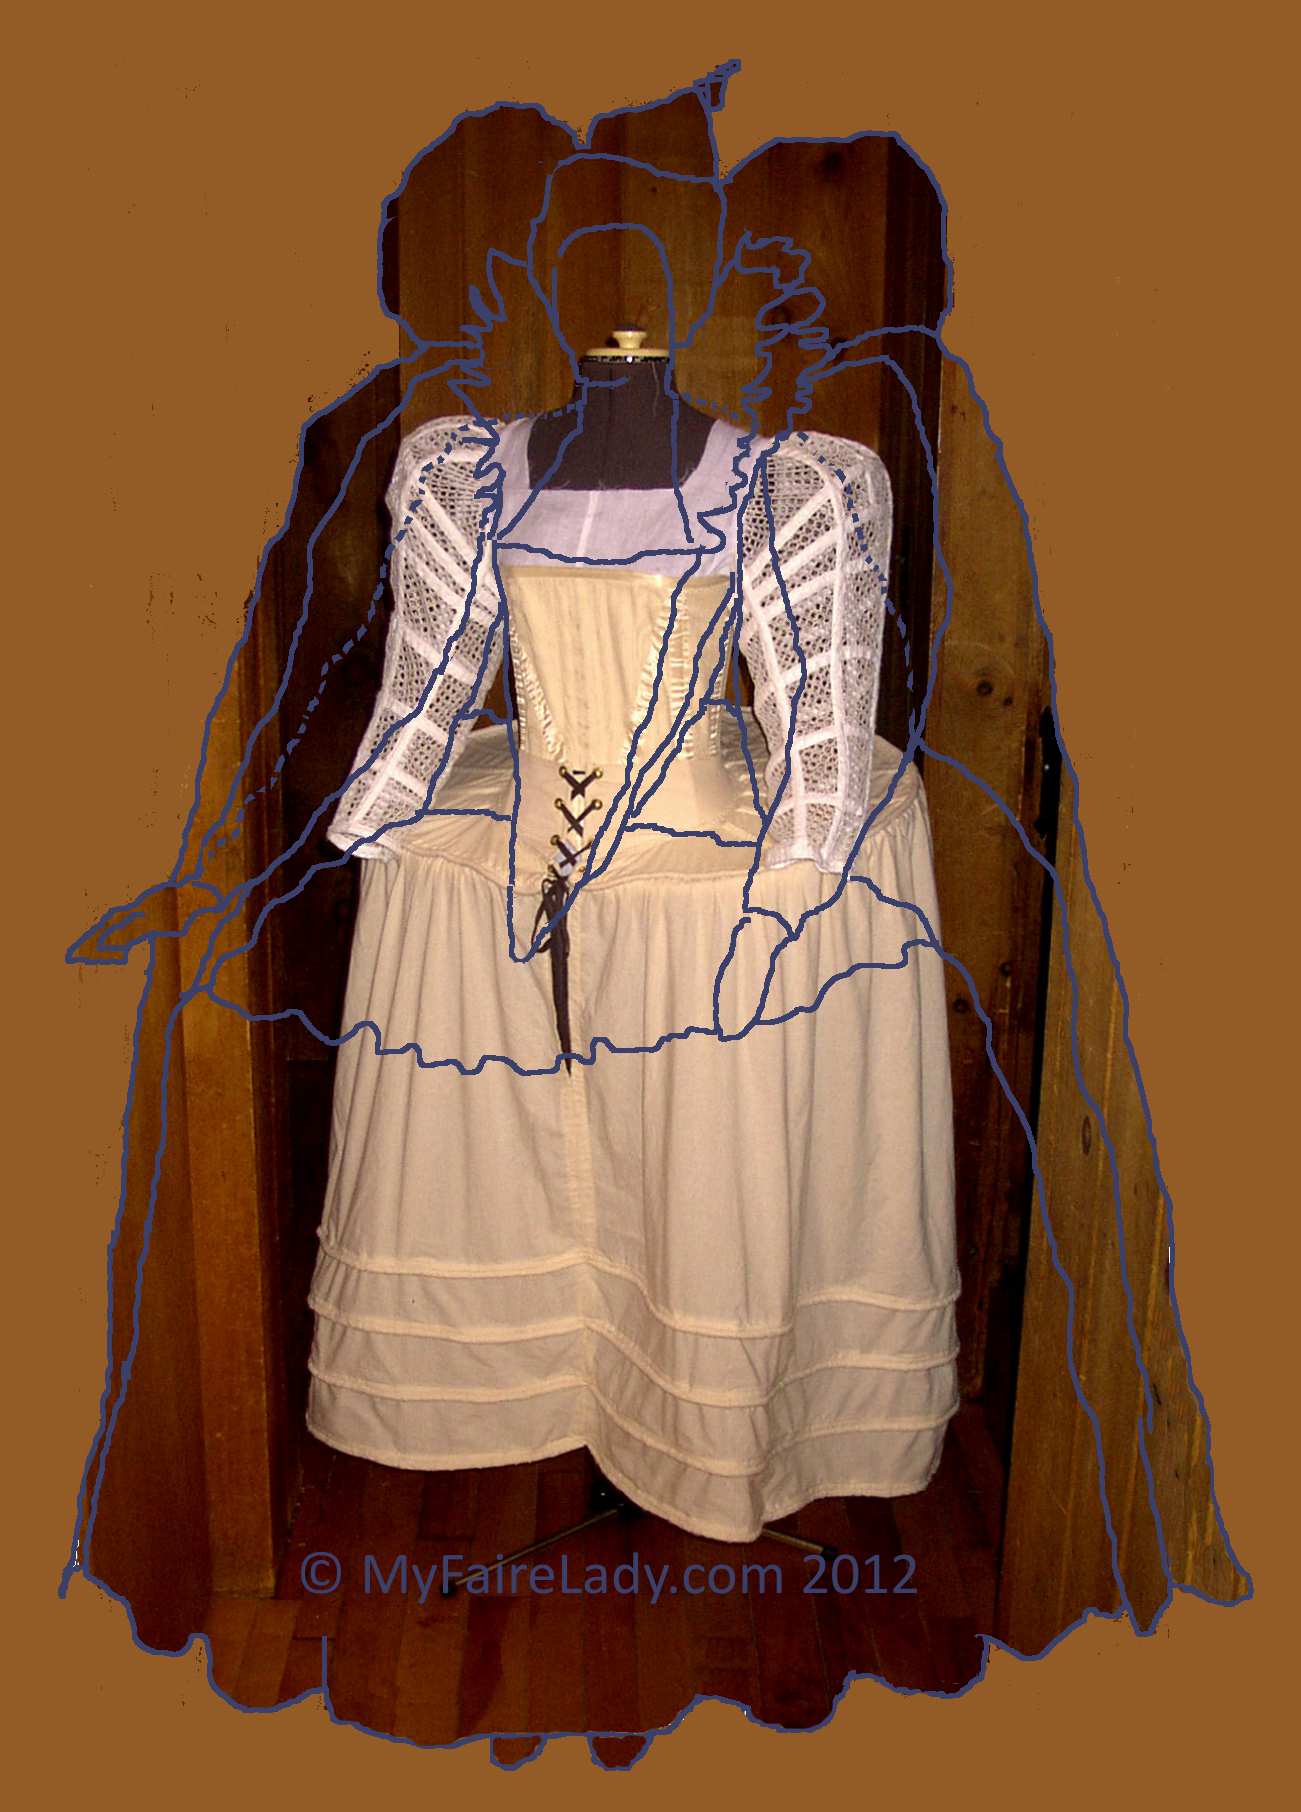
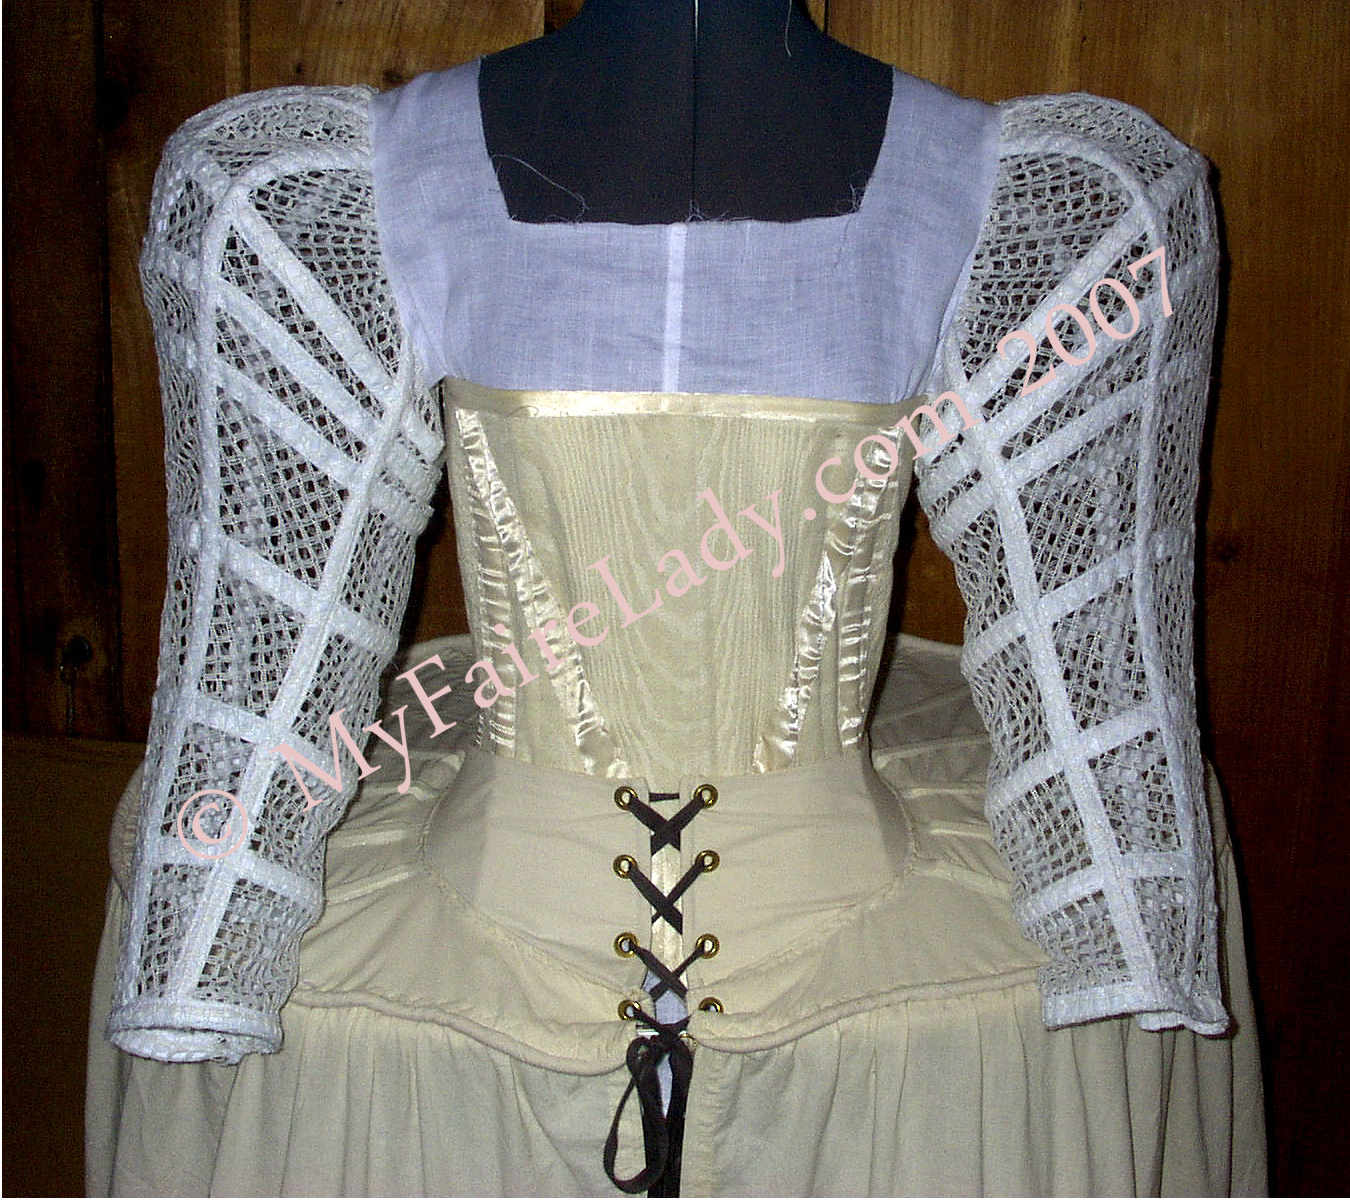
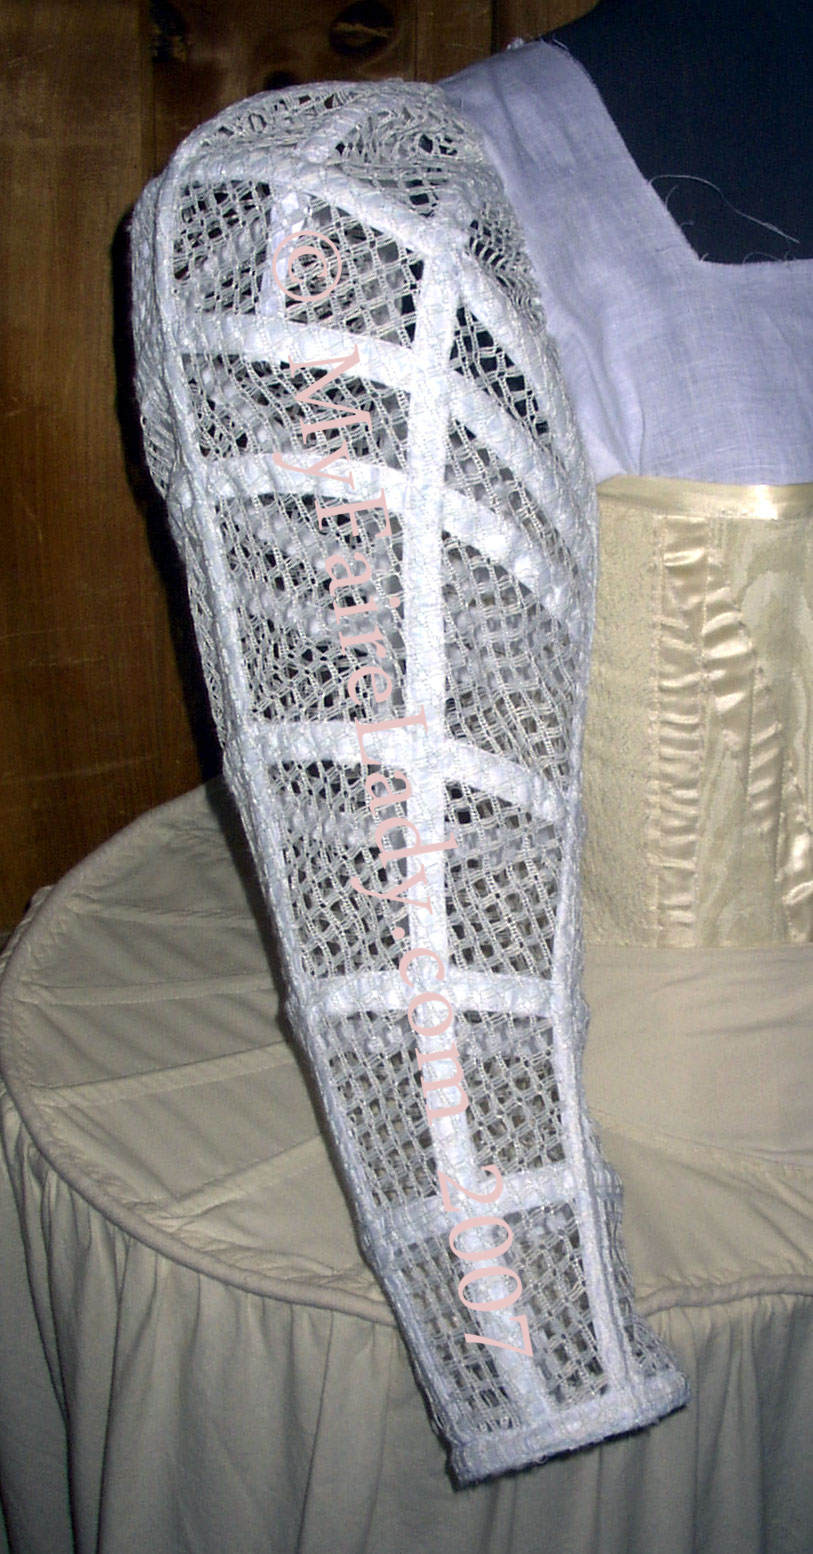
I think the pattern is going to work! I made a mock-up and just slipped it on over the old sleeve vertingale (not a typo, I just wanted to write it old style for a minute…again, but with an added “h” this time: verthingale. OK, I’m done. You’ll have to forgive me, it’s been a loooong winter.) So anyhow, I slipped the mock up over the sleeve farthingale and just pouffed it up by hand, which is why you see the wrinkles where you see them. What do you think? I’m just pleased as punch with them…can’t you tell?


Side view: Sleeve Farthingale Side ViewBack view: Sleeve Farthingale Back ViewFront view: Sleeve Farthingale Front View
Image description
Image description
Image description

Coming Soon!  NEXT CHAPTER: V2.0 Bigger IS Better!


5-17-12!  V2.0: New Thoughts on an Old Project


A few days ago, a fellow costumer (actually costuming student working on her dissertation) wrote to me asking for info on my farthingale sleeves.  In responding to her questions, I realized it's been almost 5 YEARS since I started working on the darned things and I'm still not any further along than the picures above show.   End result: I decided to get started again...BUT the problem is that I can't really take the time to actually work on the sleeves right now...SO, the next best thing was to continue where I left off, and ponder on paper where I should go next.  I'd already decided a long time ago that my sleeves were too small, but I wasn't sure what else I might need to work on. 


As you will recall from my earlier posts, I was stuck on just how much larger I should make my sleeve farthigales.  So, what I did was take one of my old pictures of the sleeves on my mannequin and superimpose on it a tracing of the Ditchley portrait.  You will see below that the Queen's body as represented in the Ditchley portrait is just waaaay tooooooo  looooooooooong to be realistic.  I tried to line up my torso with the portrait's and it seemed to "fit" well enough, though my arms & legs look short.  I think I remember reading about puposeful distortions of the Queen's image, so it may be that what we're looking at is just artistic license, but nonetheless, I would like to try to get as "close" as possible to this silhouette as I can, so...


I have decided that my sleeve farthingales need to be at least 6 inches "taller", and probably made out of some stiffer material than my cable ties, like...maybe...REEDS!  (What a concept.)   I'm also thinking that I might try shaping the reeds into a series of oblongs because otherwise what will end up happening is that the cable ties will want to shape themselves into circles.  Neither flattering nor faithful to what I see in period portraits.  If I can get myself some nice round reeds, I know I'll be able to get it to work.


Another thing I noticed is that my beloved great farthingale isn't wide enough!!! AND I need to change how I think about the front of the farthingale because it seems pretty clear that the body of the wearer really does need to be in the CENTER of the hoop, not close to the front edge as I had originally surmised.  AND that means changing how I engineer the supports UNDERNEATH this now humongeous hoop. 


I know THAT discussion belongs on another page, and I'll make an entry there in a bit, but for now excuse me for a moment while I just--


                  WAAAAAAAAAAAAAAAAHHHHHHHH!!!!


OK, better now.   Let me know your thoughts on what I've got so far.


Image description

PLUS

Image description

EQUALS:

Image description


Update 12-16-12!   They're big enough, already!


 As I mentioned in the update section, I'm going to be playing QEI in little more than a month and I figured that would be as good a motivation as any to get this dress done already!  To that end, I've been slowly re-gathering the materials I've stashed here and there, trying to remember where I hid the poufs, etc., and this weekend I decided had to be my deadline to finish tweaking of the farthingale sleeves I already had or finish the second, larger pair that I call "V2.0".


During my last update a few months ago, I had concluded that I would DEFINATELY need the larger pair.  However, since I'm in a bit of a time crunch as you might imagine, so I started by ripping out the current sleeves from their linen smock "base".   In doing that, I realized that part of *why* they were sagging was that the linen understructure just wasn't...well...structured enough.  I set out to correct that, and I am going to call upon my right to change my mind once again: the first, original pair is going to serve just fine.

I know you can't tell from the picture, but right now the Farthingale Sleeves are just pinned to the straps of my effigy corset.  I'm thinking that they'll need to be attached to something less likely to slip, though, like maybe the bodice or even the undersleeves themselves.  Otherwise I'm going to have to rig up some kind of sleeve-suspenders to keep them on my shoulders.


All in all, I'm happy with how they're looking right now.  I think they're going to work out just fine. 


Now I have to start working on the actual gown...with 32 days to go after tonight.  G'nite!

Image description


Inventive.                              Lively.                              Multi-faceted.                              Appealing.